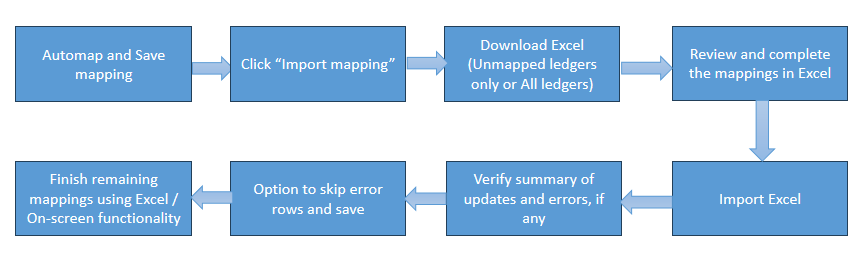
Import Mappings
Import Ledger Mappings from Excel
To simplify and accelerate the ledger classification process, the system now provides an Import Ledger Mapping capability. This feature works in addition to the existing auto-mapping mechanisms and allows users to complete or modify mappings efficiently using Excel.

The new feature allows users to download ledger data into Excel, complete or edit mappings, and upload the file back into the system.
This is a three-step process:
- Prepare the Import File
- Update Mappings in Excel
- Upload and Validate the File

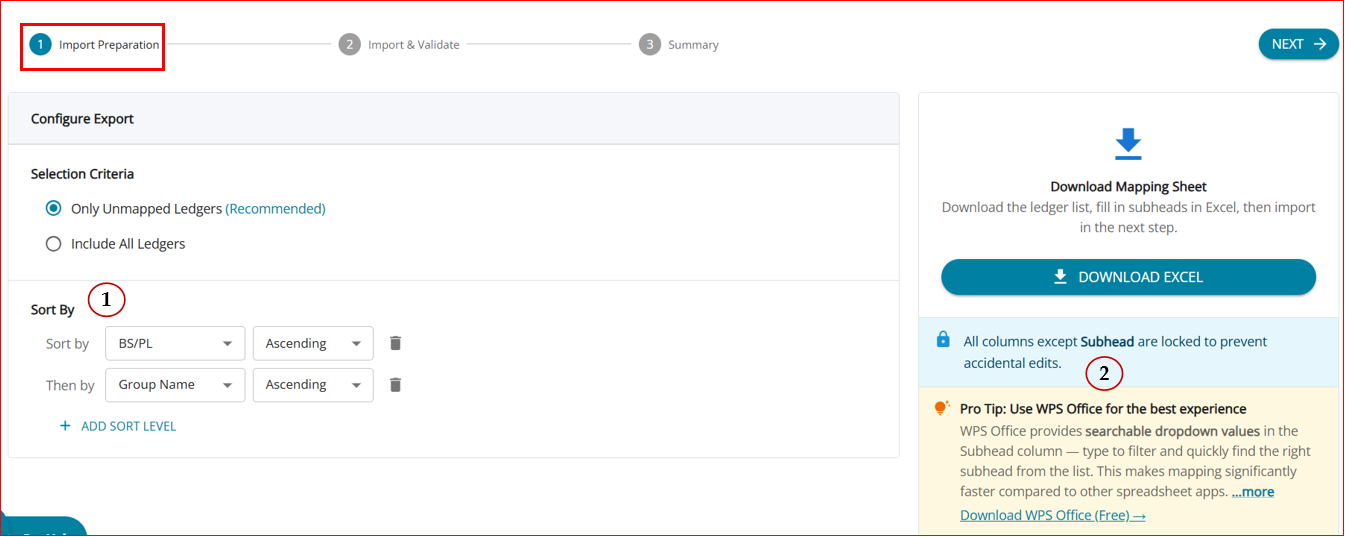
Step 1: Prepare the Import File
Key capabilities:
- Option to export only unmapped ledgers (default) or all ledgers.
- Support for multi-level sorting (e.g., BS/PL → Group Name).
If All Ledgers is selected:
- Any mapping changes made in Excel will overwrite existing mappings in the system.
- However, if a mapping cell is left blank, the system will not remove the existing mapping.
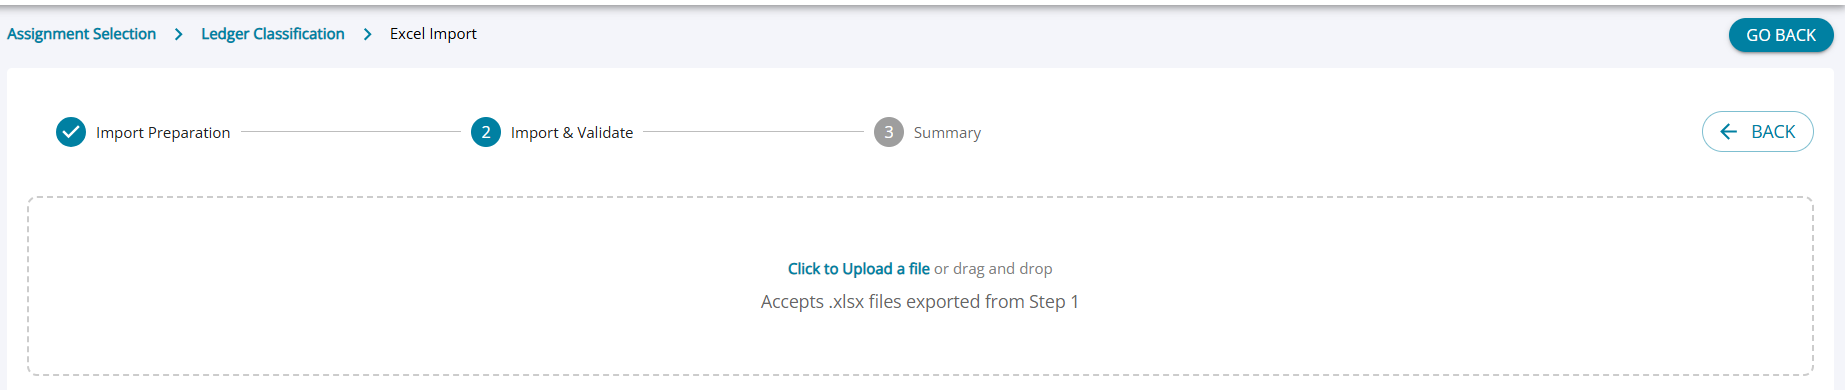
Step 2: Update Mappings in Excel, Import & Validate
Once downloaded, the Excel file will contain:
- Ledger Name
- Subhead Mapping
- Existing mapping values (if available)
Some rows will already contain mappings while others may be blank. Users can then update the mappings directly in Excel.
Recommended Tool: WPS Office
As users type, the software automatically suggests matching values from the list, similar to the selection experience within the application UI. This makes mapping faster and reduces errors.
However, using WPS Office is only a recommendation. Firms may continue using Microsoft Excel or other spreadsheet tools depending on their internal policies.
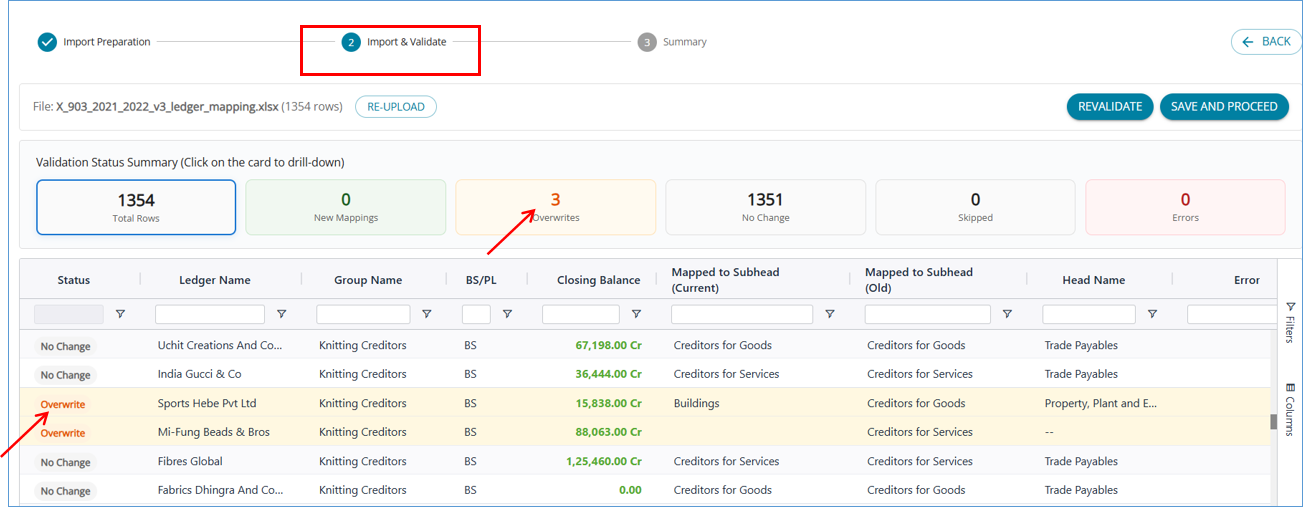
Key capabilities: Upload the filled .xlsx file and run Re-validate to check mappings.
Validation summary highlights:
- New Mappings – previously unmapped ledgers now mapped.
- Overwrites – existing mappings changed.
- No Change – mapping remains unchanged.
- Skipped – no subhead provided for an unmapped ledger.
- Errors – invalid or inactive subheads.
- Errors such as invalid subheads, inactive subheads, or missing ledgers are clearly flagged.
- Users can re-upload a corrected file and proceed to save once validation is successful.
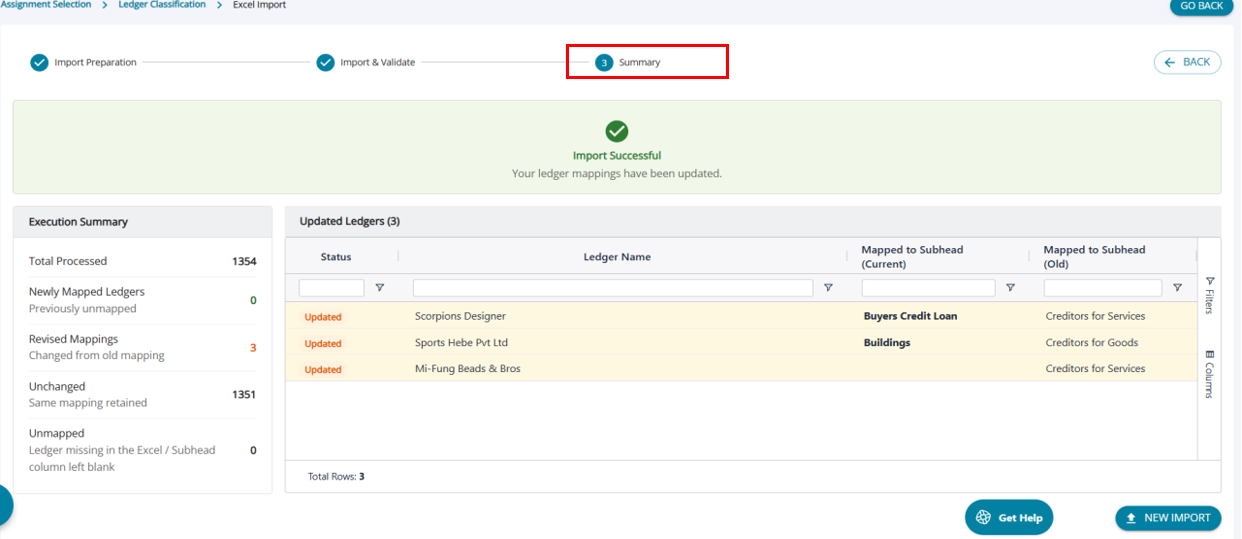
Step 3: Summary :
After saving, a summary view displays the results of the import.
Key details: Confirmation message indicating successful update of ledger mappings.
Execution summary showing:
- Total processed ledgers
- Newly mapped ledgers
- Revised mappings
- Unchanged mappings
- Unmapped ledgers
- Additional actions: Map Remaining – return to Step 1 to map any remaining unmapped ledgers.
- New Import – start a fresh mapping process.